Alright, let’s cut to the chase—if you’re running a commercial kitchen, you know a wobbly sink isn’t just an annoyance. It’s a safety hazard, a time-waster, and straight-up bad for business. I’ve seen so many operators brush it off, thinking they can just prop something under the legs and call it a day. But nah, when that sink shifts while you’re stacking stainless steel pans or dumping hot water, you’re looking at spills, damaged equipment, maybe even a slip that lands someone in the ER. And that’s before we talk about water pooling under the sink from a misaligned drain, which leads to mold, rust, and nasty health code violations. Commercial Kitchen Sinks
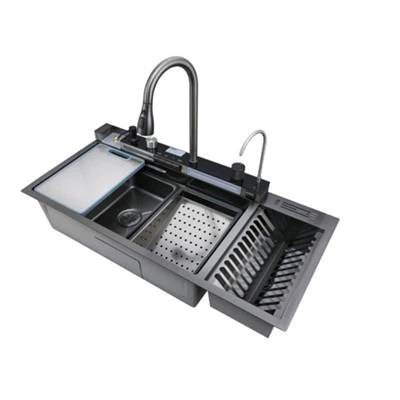
As someone who’s built commercial kitchen sinks for over a decade, I can tell you adjustable legs are the secret weapon here. They’re not just a “nice to have” — they’re non-negotiable for getting that perfect, level fit. A lot of folks reach for a spirit level (the big rectangular ones) and just adjust one leg, but if you skip the full process, you’re setting yourself up for headaches down the line. Let’s walk through this step-by-step, no fancy tools, no jargon, just what actually works for busy kitchens.
First, let’s talk about why adjustable legs are game-changing, especially if you’re retrofitting a sink into an existing counter or base. Commercial kitchen floors are rarely perfectly flat—thanks to heavy foot traffic, equipment rolling through, and maybe a few spills that made the concrete shift over time. Fixed legs can’t compensate for that, so your sink will always be off-kilter. Adjustable legs? They let you fine-tune each corner independently, so every part of the sink sits solid. Plus, they make installation way faster than messing with shims or cutting custom legs (we’ve all dealt with shims slipping out mid-install, ugh).
Before you even touch a leg, let’s prep the space. You don’t want to adjust a sink that’s sitting on a wobbly base cabinet or has stuff crammed around it. First, clear the area: move any cleaning supplies, pans, or grease traps out from under the sink. Then, make sure the counter (or the wall behind it, if it’s an under-mount sink) is flush. If it’s a drop-in sink, the rim should sit evenly on the counter’s surface—no one side hanging lower than the other, that’s a quick tell for a level issue. Also, double-check that the drain assembly is loosely connected right now. Tightening the drain while the sink’s unlevel will warp the p-trap, cause clogs, or leak later. Trust me, I’ve fixed enough p-traps from rushed installs to know this.
Now, the tools you actually need—no buying specialty stuff. You probably have these in your janitor’s closet or back office: a standard spirit level (2-foot is ideal, not the tiny pocket one—those are useless for big surfaces), a crescent wrench (adjustable, duh), and a small screwdriver (most adjustable legs have a lock nut, so you’ll need this to hold the bolt while you turn the leg). Oh, and a helper? If you have one, it’s way easier to hold the sink steady while you adjust, but if you’re flying solo, just be careful not to jostle it too much mid-level check.
Let’s get to the actual leveling steps, and I’m gonna make this super clear, no skipping corners. First, place the spirit level on the back edge of the sink, aligned with the length of the sink (so left to right, along the wall). Look at the bubble—if it’s not dead center, that means the sink is tilting either left or right. Find the adjustable leg on the low side. Most commercial sink legs have a threaded part, so you just twist the leg clockwise to raise it, counterclockwise to lower it. Hold the lock nut with your screwdriver so the leg doesn’t spin when you turn it—super important, because if the whole leg rotates, you’re not actually changing the height. Once you adjust that leg, check the level again. Don’t crank it all the way up in one small turn—make tiny adjustments, like a quarter turn at a time, then recheck. That’s how you get precision without overdoing it.
Next, the front to back level. Move the spirit level to the front edge of the sink, so it’s going from back wall to front. Do the same thing: find the low front or back leg, adjust it with small turns, recheck, until the bubble is dead center. Wait, don’t stop there—here’s the part most people miss. You have to check the diagonal too. Grab the spirit level and lay it across the sink from the back left corner to the front right corner. Then flip it around to back right to front left. If the bubble isn’t centered on both diagonals, that means one of the side legs is off. This is crucial because a sink that’s level left-right and front-back but off diagonally will still wobble when you set something heavy, like a full pot of soup. I can’t tell you how many install calls we get where the operator says “it looked level when I checked” but the diagonals are off, so the sink rocks when you put a 5-gallon bucket of water in it.
Once all the levels (left-right, front-back, diagonals) are perfect, you need to lock the legs in place. This is another step people skip, and then their sink drifts over time. Go to each leg, tighten the lock nut against the sink’s base frame. Use your crescent wrench to get it snug—don’t over-tighten, because you don’t want to strip the threads, but make sure it’s not loose. If you skip this, the leg can unscrew slightly from regular use, especially when you’re banging pans around or cleaning with a pressure washer (which I know some kitchens do, don’t lie).
Wait, what if your sink is under-mount? That’s a little different, because it’s attached to the underside of the counter, not sitting in a cut-out. For under-mount, you still adjust the legs to get the sink level, but you have to make sure the sink is pressed firmly against the counter’s underside while you adjust. Sometimes you’ll need to adjust the legs a little lower than you think, because you’ll tighten the mounting brackets later, which pull the sink up slightly. Test this by lifting the sink gently into place under the counter, checking for gaps between the sink rim and the counter—if there’s a gap, adjust the legs up a tiny bit before locking.
Now, quick pro tips from the trenches, stuff we’ve learned from working with 1000s of restaurants, cafeterias, and catering companies. First, if your kitchen floor is really uneven (like, we’re talking 1/4 inch difference from one corner to the other), don’t force one leg all the way out. That puts extra stress on the leg, the sink frame, and the counter, which can lead to cracking or bending over time. Instead, use a small, rigid shim (not cardboard, that’ll get soggy) under the leg if needed—just make sure the shim is tight, so it doesn’t shift. But honestly, adjustable legs are designed to handle most minor unevenness, so shims are only for really extreme cases.
Second, after you level it, test it. Fill a few pots with water, set them on each corner, and check for wobbling. Pour a full bucket of water into the sink and see if it drains evenly—if water pools on one side, you missed a spot. And give it a gentle push back and forth; if it moves at all, you didn’t lock the legs right or one corner’s still off.
Third, maintenance. Every 6 months, go back and recheck the level. Kitchens take a beating—heavy equipment, temperature changes, cleaning chemicals—all that can make legs shift over time. It’s a quick 5-minute check, and it saves you from way bigger problems later.
Now, if you’re just installing a new commercial sink, adjustable legs should be non-negotiable. When we design our sinks, we build the legs with heavy-duty steel threads, not the cheap plastic stuff that strips after a few uses. We size them to handle the weight of a full sink (we’re talking 50+ pounds empty, more when full) and they’re rust-resistant, so they hold up in the high-moisture kitchen environment. A lot of budget sinks come with fixed legs, but don’t cut corners here—adjustable legs are worth the little extra cost, because they save you on installation time, maintenance, and health code fines.
At the end of the day, a level commercial sink isn’t just about convenience—it’s about keeping your kitchen safe, compliant, and running smoothly. No more spills, no more clogs from misaligned drains, no more fines for code violations. If you’re in the market for a new commercial kitchen sink, or you just need help troubleshooting a wobbly one we supplied, hit us up to talk through your needs. We’ve worked with all kinds of setups, from small diner kitchens to big hospital cafeterias, so we can give you personalized tips that fit your space.

And one last thing—don’t forget that a little time spent leveling your sink now will save you hours of headaches later. I’ve seen operators put off leveling for weeks, only to have to rip out the sink and redo the drain because it was leaking. Take 10 minutes, follow these steps, and you’ll be glad you did.
Stainless Steel Farmhouse Sinks REFERENCES
- National Restaurant Association. (2022). Commercial Kitchen Equipment Installation Best Practices.
- NSF International. (2021). Standards for Commercial Foodservice Sinks and Components.
- Occupational Safety and Health Administration (OSHA). (2020). Slip, Trip, and Fall Prevention in Foodservice Establishments.
- Kitchen Tech Magazine. (2023). Maintenance Tips for Commercial Foodservice Equipment.
Dingyi Shichuang Co., Ltd.
As one of the most professional commercial kitchen sinks manufacturers and suppliers in China, we offer a wide range of products with superior quality. Please rest assured to wholesale customized commercial kitchen sinks made in China here from our factory. Contact us for free sample.
Address: Rm908, Building 4, United Fortune Plaza, Jinan Area,China (ShanDong) Pilot Free Trade Zone
E-mail: info@dingyishichuang.com
WebSite: https://www.dysckitchensink.com/
